How to Make a Spore Print
One of the main reasons for making a spore print of a mushroom or any other kind of fungus is to help in the process of identification. The colour of the spores, when seen en masse, is one of the best ways of determining which mycological family the specimen belongs to - for example the Amanitaeae (which have whitish spores), Cortinariaceae (which have rust-brown spores), Entolomataceae (which have pinkish spores) etc.
In some families there is a range of spore colours. For example in the family Russulaceae some genera have whitish spores while others have yellow spores, ochre spores etc. The particular colour of the spore print can help you narrow down the number of possibilities in your quest to identify the specimen to species level.
Preparing a mushroom spore print
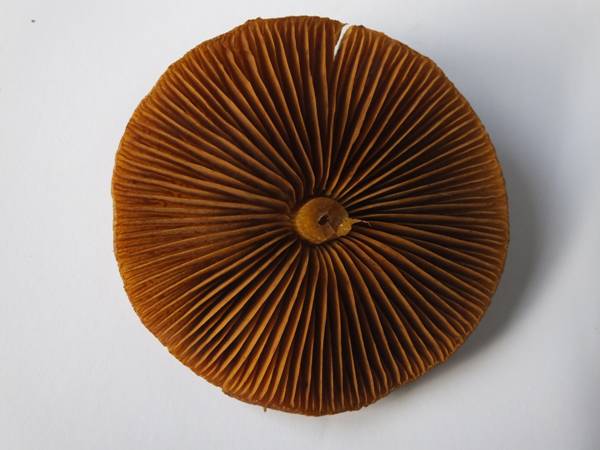
Step 1. Remove the stem so that when you turn the cap over the gills will make close contact with the paper. Some stems snap easily from the cap, but in most instances it is best to cut the stem using a scalpel or a very sharp knife.
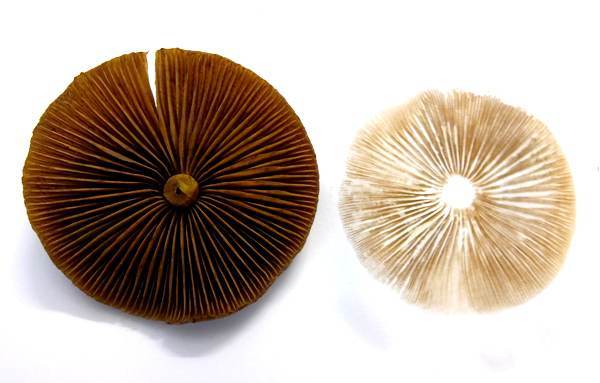
Step 2. Place the cap, gills downwards, on white paper. This works okay for mushrooms whose spores are not white! For white-spored mushrooms use black paper or clear plastic or glass. If you intend looking at the spores under a microscope, then whatever colour the spores are making the spore print on a microscope slide or (better still) a slide cover slip is ideal.
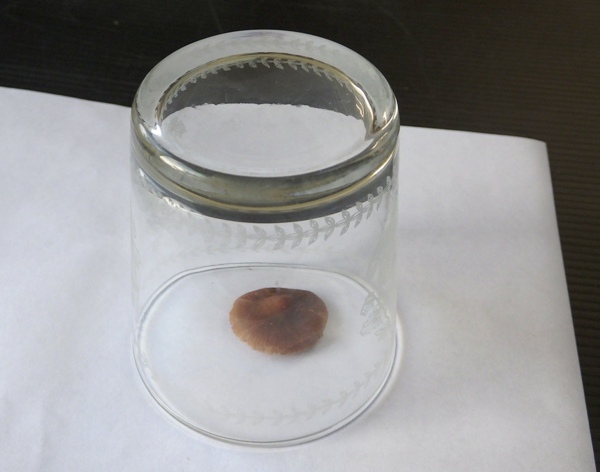
Step 3. Place a tumbler on top of the cap to prevent it from drying out. Leave the tumbler in place for two or three hours. Here's a useful tip: some small mushrooms tend to dry out very quickly even when covered, but if you place a piece of wet tissue paper on top of the cap you will avoid this problem.
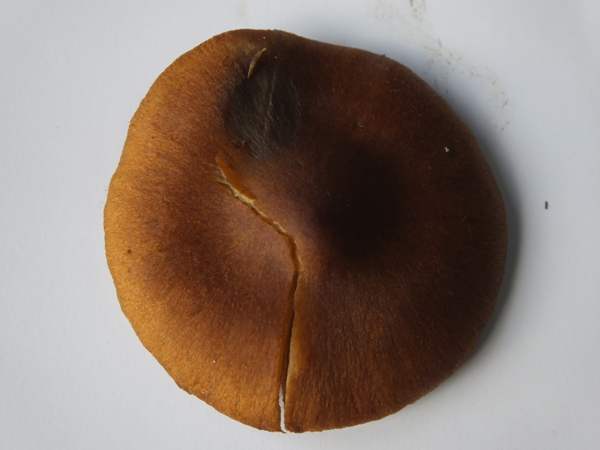
Step 4. Remove the tumbler and then carefully lift the cap. If you want to keep the spore print or to make several such prints for display purposes, you will want to ensure that the spore patterns will not be smudged during handling. Spray the completed spore print with artist's clear varnish. (Hair lacquer is not as good, but it's a lot better than nothing.)
Making spore prints from other kinds of fungi
Boletoid fungi (those producing their spores within tubes) and Hydnoid fungi (those producing their spores on spines) can be treated in exactly the same way as gilled fungi, and their spore prints consist of patterns of dots or of rings respectively.
Cup fungi - for example Peziza species - should be placed with the fertile (inner) surface downwards. The resulting spore pattern is a disc with no gill, pore or spine patterning, of course.
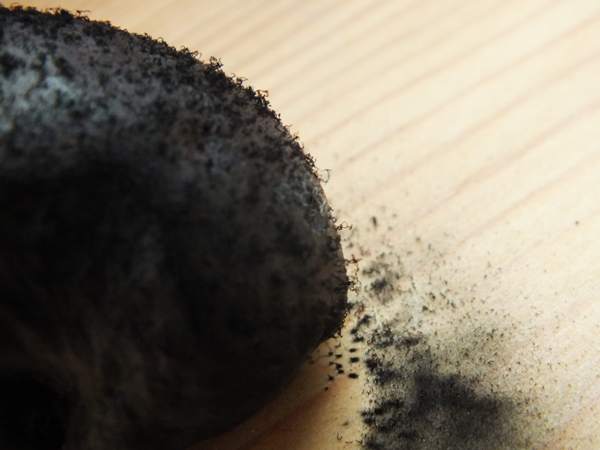
Flask fungi - for example Daldinia species - throw their spores around their complex fruitbodies (stromata), and so the print pattern is made close to but not beneath the fungus specimen, as shown below:

Fascinated by Fungi. Back by popular demand, Pat O'Reilly's best-selling 450-page hardback book is available now. The latest second edition was republished with a sparkling new cover design in September 2022 by Coch-y-Bonddu Books. Full details and copies are available from the publisher's online bookshop...